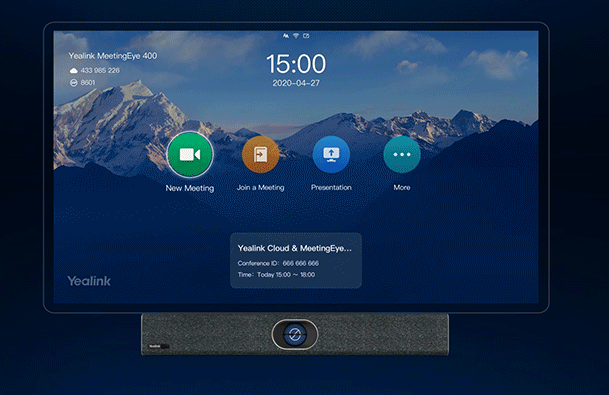
Video conferencing is no longer a luxury but a necessity in today’s digital-first world. The Yealink MeetingEye 400 is a powerful all-in-one video conferencing endpoint designed for small to medium-sized rooms. With its AI-powered features, high-resolution camera, and exceptional audio capabilities, it offers a professional-grade experience.
This ultimate guide walks you through the complete setup process of the Yealink MeetingEye 400, ensuring you maximize its features and start your meetings with confidence. Whether you’re a tech expert or setting it up for the first time, this guide will help you every step of the way. Plus, you can get your device at Online Electronics Shop, where genuine solutions and expert support are just a click away.
What Comes in the Box
Before you begin, unbox the following components:
- Yealink MeetingEye 400 unit
- Power adapter
- Remote control
- HDMI cable
- Ethernet cable
- Wall-mount bracket
- Quick start guide
Having all the components ready will make your setup smoother and faster.
System Requirements
To ensure optimal functionality, make sure your meeting room has:
- A compatible display (monitor or TV with HDMI)
- Stable network connectivity (wired or wireless)
- Power source near the installation area
- A flat surface or wall space for mounting
Step 1: Physical Installation
The Yealink MeetingEye 400 can be mounted on a wall, TV, or placed on a flat surface near your display.
Wall or TV Mounting:
- Use the included bracket to securely mount the unit.
- Align it with the center of the screen for optimal camera framing.
- Ensure there is no obstruction in front of the camera or microphones.
Tabletop Setup:
- Simply place it below or above the screen.
- Make sure it’s level and stable.
Step 2: Connecting the Cables
- Plug one end of the HDMI cable into the Yealink unit and the other into the display.
- Connect the Ethernet cable to your network port for wired internet.
- Plug in the power adapter and switch on the device.
- Optionally, connect a USB keyboard or mouse for easier navigation during initial setup.
Step 3: Initial Boot and Configuration
When the device powers on for the first time:
- Follow the on-screen wizard to select your language and region.
- Connect to Wi-Fi if not using Ethernet.
- Sign in with your preferred platform (Microsoft Teams, Zoom, or Yealink Meeting).
- Update the firmware if prompted to ensure you have the latest features.
Step 4: Platform Integration
The Yealink MeetingEye 400 supports native integration with:
- Microsoft Teams Rooms
- Zoom Rooms
- Yealink Meeting platform
Choose your desired platform and sign in with administrator credentials. This will sync your calendar, enable one-touch join, and allow full platform features.
Step 5: Adjusting Camera and Audio Settings
Navigate to the settings menu:
- Enable auto-framing and speaker tracking under the camera options.
- Adjust microphone sensitivity and enable noise suppression.
- Set default volume levels for speakers.
These adjustments ensure your team members are seen and heard clearly during every meeting.
Step 6: Wireless Content Sharing
To present wirelessly:
- Use the Yealink WPP20 presentation pod (if available)
- Or enable wireless sharing through Yealink’s native application
- Ensure both the laptop and MeetingEye 400 are on the same network
Sharing is instant, making presentations more fluid and professional.
Step 7: Using the Remote Control
The included remote provides access to:
- Volume controls
- Call management (join, end, mute)
- Camera zoom and direction
- Home and back navigation
It allows users to operate the system without touching the device, adding convenience during active meetings.
Step 8: Device Management and Maintenance
Yealink provides a cloud-based Device Management Platform where IT teams can:
- Monitor device performance
- Push firmware updates
- Troubleshoot issues remotely
- Configure settings across multiple devices
This centralized control reduces downtime and streamlines maintenance.
Common Troubleshooting Tips
- No video output: Check HDMI connections and source input on your display.
- Audio issues: Ensure the correct audio output is selected in settings.
- Device not connecting to network: Re-enter Wi-Fi credentials or use Ethernet.
- Firmware update failed: Restart the device and try again using a stable connection.
Conclusion
The Yealink MeetingEye 400 is a robust solution for modern businesses seeking professional video conferencing capabilities. With its easy installation, intelligent features, and seamless platform compatibility, setting it up is straightforward and rewarding. When sourced from a reliable vendor like Online Electronics Shop, you’re guaranteed authentic equipment backed by helpful support.
Once setup is complete, your meetings will be transformed—more productive, more engaging, and more collaborative than ever before.
FAQs About Yealink MeetingEye 400 Setup
- What is the best location to mount the Yealink MeetingEye 400?
Mount it at eye level, aligned with the center of your screen, either on the wall or on a TV. - Does the Yealink MeetingEye 400 require a PC or external camera?
No, it’s an all-in-one solution with built-in computing, camera, and audio system. - Can it be used wirelessly?
Yes, it supports Wi-Fi connectivity and wireless content sharing for presentations. - Is Microsoft Teams pre-installed?
The device supports native Microsoft Teams Rooms; you just need to sign in to activate it. - How do I update the firmware?
Go to the settings menu and check for updates under “Device Management.” A network connection is required. - Where can I purchase the Yealink MeetingEye 400?
You can buy it from Online Electronics Shop, a trusted source for genuine Yealink conferencing systems.